
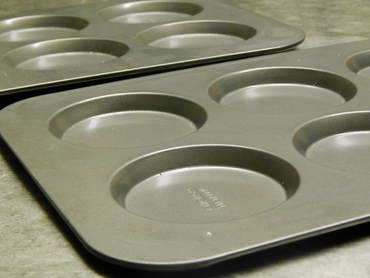
 After I said morning prayer and cleaned up after my sourdough pancake breakfast, I made a batch of multigrain dough. I can’t give you the exact recipe, but it had white bread flour, a multigrain mix I brought (whole wheat, cornmeal and oatmeal), the leftover sourdough pancake batter, a cup of warm milk and a cup of cold coffee, along with yeast, a little sugar, salt, two eggs, and vegetable oil. I kneaded it a solid 15 minutes to make sure I developed the gluten matrix, which takes more time in a multigrain dough. After it proofed for just over an hour, I shaped six hamburger buns, four hot dog buns, and a sandwich loaf. Before long the cabin smelled glorious, and there was a week’s worth of bread cooling on the counter.  Although it’s not absolutely necessary to have them, I used special pans for the hamburger buns. I’m not sure if they are for buns or for muffin tops (I’ve seen them labeled both ways) but they make for a nice uniform shape. A hamburger bun requires about 2 ounces of dough, perhaps more if you’re serving a half pound burger. My burger for supper was more modest and the bun was a perfect size. The burger itself did not remain on the plate long enough to get a picture, but as you can see above, at least I managed to get a shot of the buns cooling on the picnic table on the front patio! Now that I have the grill up and running, I’ll have to start experimenting with pizza. I’ve heard a lot of people swear by pizza cooked directly on the grate, but that doesn’t appeal to me as much as heating a pizza stone in a closed grill, which seems to me to imitate an authentic pizza oven more closely. They even make inserts for kettle grills that transform them into pizza ovens—I may have to make an investment in one before long. My long term goal is a wood-fired pizza oven for the west patio of the monastery---but more on that another day.
0 Comments
 Many people don't realize that improvisational comedy like you see on "Whose Line Is It Anyway?" is not merely a cadre of witty people making things up as they go along. Improv actually has a number of rules or guidelines to keep the scene from stalling, going in circles. or just being dull. Most people have to study and practice a long time to learn how to apply the rules and, eventually, when to break them. Similarly, an experienced chef or baker often improvises to develop a new dish, based on what's in season at the market or what's in the pantry right now, and shows like Chopped give us ample evidence of how culinary know-how and creativity (and sometimes, pure dumb luck!) can combine to yield extraordinary results. Whenever I present a bread demo and mention that I made a certain recipe up on the fly, someone always asked, "But how did you know that was going to work?" The answer, of course, is that you might not know for certain, but with enough knowledge and experience, you can increase your chances of success. I recently created a new biscuit recipe using a combination of experience, improv, and serendipity. I wanted to bake something for supper for the feast of St. Joseph, and normally that would mean the traditional cream puffs, but we had received a donation of several trays of bite-sized desserts (left over from a shower) so we didn't need any more sweets in the house. I didn't have enough time for yeast rolls so I decided on drop biscuits, because I had buttermilk in the fridge from Irish Soda Bread. I had noticed that the chives had already sprouted in the herb garden, so Cheddar Chive Biscuits seemed in order. Alas, there was no decent cheddar in the fridge, but I did spy some some limp celery and a handful of baby carrots. From all that, Buttermilk Garden Drop Biscuits were born. I took a basic drop biscuit recipe from The Joy of Cooking (surprisingly, there was nothing comparable in Bernard Clayton's Book of Breads) but it used 2% milk, so I knew I would need to add some baking soda to get more loft. Baking powder and baking soda are not interchangeable, as the former is activated by heat and the latter by acidic ingredients. But baking soda is much ore powerful, so only a quarter teaspoon was needed. I also increased the amount of flour by a quarter cup, for two reasons. First, the original recipe called for shortening, and all I had was butter, which has a higher moisture content. Secondly, minced celery and shredded carrots add a lot of water to the mixture as well. I didn't want my drop biscuits to spread out into savory pancakes, so I added that little extra bit of all-purpose flour. I also knew that the veggie flavor in the biscuits would be more prominent with a little more salt, but why add just salt when you can also add flavor with a salty aged cheese? There was some excellent Romano left over from a recent pizza party which made its way into the mix. Drop biscuits mix up in about four minutes and bake in less than fifteen, so it wasn't long before these beauties were out on the counter. They were the perfect accompaniment to grilled chicken breasts---the-herb-and-veggie flavor is exquisite but fairly subtle and would overpowered by a more heavily seasoned dish. I had one with my Lenten soup today and it was a treat. So now that you've got a basic recipe, try your own improvisation, based on what you find in the produce section, the fridge, or the backyard garden. I'd love to hear about your baking adventures. God bless and happy baking! Buttermilk Garden Drop Biscuits
2 1/4 cups all purpose flour 1 tablespoon sugar 1 teaspoon salt 2 teaspoons baking powder 1/4 teaspoon baking soda 5 tablespoon butter 1/4 cup minced fresh chives 1/4 cup finely shredded carrot 1/4 cup minced celery 1/4 cup shredded romano cheese 1 cup of buttermilk Preheat oven to 425 degrees. Stir dry ingredients together in a medium size bowl. Cut in butter using a pastry blender or two knives. Mix in chives, carrots, celery and cheese. Add milk and stir until just blended. Drop by tablespoons onto a lightly greased baking sheet. Bake at 425 degrees for 12 to 15 minutes, or until lightly browned. Cool slightly and serve warm. Makes 12 large biscuits. 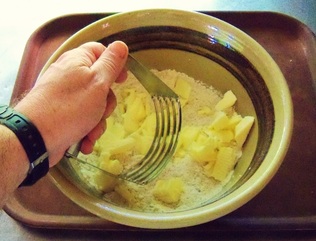 Although my mother had pancake mix and instant potatoes in the cupboard when I was growing up, I don’t recall her keeping Bisquick or Jiffy baking mix around. I must confess I have never used a baking mix until just a few weeks ago when I was finishing up my next book project (Baking Secrets from the Bread Monk) and decided to include a recipe for a homemade version of a homemade “Bisquick-like-baking-mix”. Since then I’ve used it for pancakes, cheddar drop biscuits and shortcake with excellent results. The one in the book uses all-purpose flour alone, but here I’ve added some whole grains, mostly because that’s how I like my waffles! If you already use baking mixes, you might be surprised to see that this version requires refrigeration, but you might be equally surprised to discover that the Bisquick package also recommends that you refrigerate their product after opening. But most baking mixes use shortening and have a number of preservatives and therefore are more “shelf-stable” as they say in the food biz. My version has no preservatives and uses butter (far fewer trans fats), which with the addition of whole grains makes it a healthier alternative. You can use it one-to-one in any recipe that calls for baking mix. Six cups of total of the different flours may seem like a lot, but you'll go through it in no time, since you can use it for pancakes, waffles, muffins, coffeecakes, biscuits and even scones. Recipes abound on the internet, so mix up a batch of multigrain goodness and try a few out. Multigrain Baking Mix 3 cups all-purpose flour 1½ cups whole wheat flour ¾ cup quick cooking oatmeal ½ cup yellow cornmeal ¼ cup milled flaxseed 3 tablespoons baking powder 1 tablespoon salt ½ cup (1 stick) cold unsalted butter, cut into slices Place dry ingredients into food processor and process until thoroughly mixed. Add butter and pulse until well blended. You can also cut in the butter with a handheld pastry blender, although that takes a while longer. Store in an airtight container in the refrigerator up to 6 weeks (depending upon how fresh your butter is). If you use salted butter because that's all you have, reduce the salt in the recipe by a half teaspoon, ADDENDUM 10/13/16
Since making my most recent batch of this baking mix, I have made muffins and biscuits with ordinary recipes off the website of Betty Crocker (the manufacturer of Bisquick) and got lovely results. The ongoing account of taping my Craftsy class August 2 - 5. . . 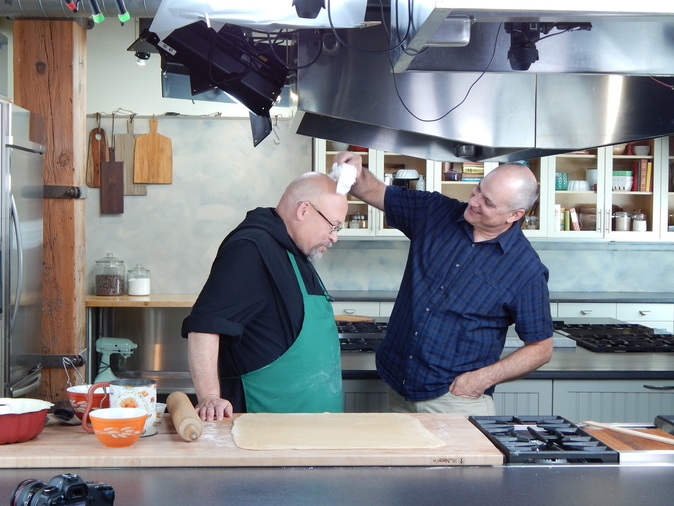 Makeup call for the shoot was always at 8 a.m.--the stylist Lillian was a pleasure to work with and a good conversationalist. The biggest struggle of course was keeping the shine off my bald pate, and frequent blotting and powdering was required throughout the day. It wasn't as bad as when I shot Breaking Bread in St. Louis, which is the humidity sinkhole of the Midwest---all of the humidity of the Great Plains drains into center field of Busch Stadium. The air is so dry in Denver that I walked the 16th Street Mall in 90 degree heat and it felt like 75 degrees in Illinois. Day One included the Basic Sweet Dough recipe (an adaptation of Best Ever Crescent Roll Dough) and rose rolls, but not made for dinner, but as cinnamon rolls with bright red frosting (see previous post). I've made the rose rolls for nearly every monastery holiday meal, but only as cinnamon rolls a couple of times, once on the feast of our Lady of Guadalupe, and another time for my mom's birthday. We continued shooting the lessons in order, Lesson 2 being for jellyroll variations. The class is meant for advanced beginner or intermediate bakers, so I figured expanding on the jellyroll technique used for cinnamon rolls would be the next step. The first recipe was for Breakfast Butterflies, an old fashioned roll you don't see much these days. I like them with brown sugar cinnamon or almond filling, but we decided to use blueberry. You can find the recipe for the blueberry filling HERE, but I find that Solo Blueberry pastry filling also works well. The recipe for the rolls came from my book The Breadhead Bible. The segment for Sweetheart Coffeecake followed, which I featured in an earlier blog--find the photo tutorial HERE. Craftsy is the perfect platform for this kind of teaching, because a well-shot video is always better than my amateur photographs! The other feature on the Craftsy platform that Breadheads will appreciate is that at the bottom of the window where the lesson plays, there is a "30 second replay" button--click it and the last 30 seconds of the video plays on a loop for as long as you want. People learning to knit, crochet and quilt on Craftsy really like this feature! Producer Jon Clark had scheduled one more segment for the day, so we went on to Lemon Fantans, another old-fashioned roll but usually made with butter between the layers and served at dinner. To make it into a sweet treat, I added granulated sugar mixed with lemon zest to the layers, and drizzled on a thin icing made with lemon juice. The cameraman Marshall declared this roll his favorite and would have consumed more of them if we hadn't had to keep some idea for product shots! My photo tutorial from last summer is HERE, and the results from the shoot are below. The shoot ended about 6 p.m., after which I took off my apron and my habit, threw on a Rockies jersey and walked the four blocks to Coors Field---yep, that's how close the studio is to the ballpark! The Rockies pounded the Dodgers 12 - 2, a typical Mile High home run fest. DJ LaMahieu hit one that just barely cleared the wall, and Dodger center fielder Joc Pederson jump for it, missed, and lost his glove over the wall in the shrubbery around the fountains! As he stood there waiting for an usher to throw his glove back over, you could tell from his stance that he was NOT happy with himself. I celebrated by going back to the concession stands. Bread in the studio, bratwurst in the ballpark---not sure it gets much better.
 Recently I've been experimenting with breakfast breads and I remembered that it's been awhile since I made Breakfast Butterflies. Butterfly rolls are an old-fashioned recipe one never sees anymore in cookbooks but which needs to be revived. You can use just about any filling, from cinnamon sugar to pesto, but I like mine with blueberry or almond filling. (A quick aside--I highly recommend the Solo brand Cake and Pastry Filling, which comes in a great many flavors and is every bit as good as homemade, in my experience. They are a member of the Home Baking Association, which has sponsored some of my videos, but I've not been paid or otherwise compensated for this little plug!) Butterfly rolls are not much much harder to make than cinnamon rolls, with just a couple of other steps. You can use your favorite roll dough and your favorite filling, so what's not to love? I find that they are plenty sweet without a powdered sugar icing, but if you want a nice finish on them, heat up some light corn syrup in the microwave for about 15 seconds and brush that over the tops. As you can see from the photo above, it gives them a lovely shiny appearance but without adding a lot of extra sugar that will obscure the taste of the filling. So have I convinced you to make them? I hope so. Click HERE for the recipe page. 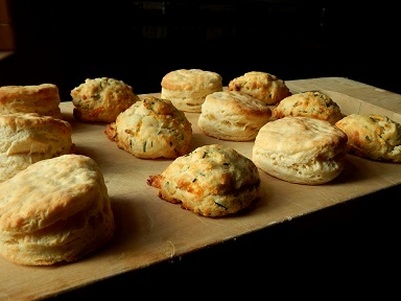 Today when I walked into the kitchen after school, as usual I took a peek at the menu for supper: creamed chicken over cheddar biscuits. Unfortunately I knew, with some dread, what that meant: tiny, dry hockey pucks from the freezer, loaded with partially hydrogenated blandness. Not on my watch. So I rolled up my sleeves and banged out Biscuits of Victory and a batch of Cheddar Chive Drop Biscuits. These latter are very similar to the ones everyone loves at Red Lobster. Except way better and way cheaper and they're done in about 30 minutes. Drop biscuits are a breeze and you don't need a rolling pin or biscuit cutter. A Pastry blender is useful, however, and I recommend the one with metal blades rather than wire. The recipe calls for shortening, but I used butter because that's what I had in the house. God bless and happy baking! Cheddar Chive Drop Biscuits
2 cups all-purpose flour or gluten-free baking mix ½ tsp. salt 1 Tbs. sugar 2 tsp. baking powder 2 to 4 Tbs. chopped fresh chives ½ cup vegetable shortening 1 cup milk ¼ cup shredded sharp white or yellow cheddar Preheat oven to 425 degrees. Stir dry ingredients together in a medium size bowl. Cut in vegetable shortening using a pastry blender or two knives. Add milk and stir until just blended. Drop by tablespoons onto a lightly greased baking sheet. Bake at 425 degrees for 12 to 15 minutes, or until lightly browned. Cool slightly and serve warm. Makes 12 biscuits. 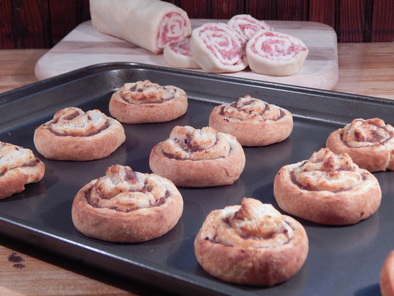 Sausage Roll-Ups are an easy appetizer or brunch item. Sausage Roll-Ups are an easy appetizer or brunch item. For family potlucks, my mother often makes sausage roll-ups. These savory appetizers are a snap to make, and much of the prep can even take place the night before, so having them for breakfast or brunch isn't much of a chore. They can be made with any kind of bulk sausage: garlic, sweet hot Italian, maple, sage and onion, etc. We're fairly certain my mom got the recipe from Pillsbury, since it uses their crescent rolls in a tube. My friend Julie refers to their biscuits as "whomp biscuits", since you peel the label off the tube and "whomp!" it on the edge of the table. You can certainly try that if you want, but allow me to say this: you can make exquisite homemade biscuit dough with far less fuss and get a much better result. Besides, as adorable as he is, Poppin' Fresh creeps me out a little. I just don't like to see my food animated. And we're almost the same age but he's virtually unchanged in appearance, which makes me wonder about all those preservatives. So we're going to start with a basic biscuit dough. I say "basic" but what I'm really referring to is BISCUITS OF VICTORY! For many years I was unable to make a decent biscuit, but I finally found and adapted a recipe that worked for me every time. Hence, the epic name, which must be pronounced in a heroic voice like the voice over on Super Friends. The recipe for the dough is HERE, directions for the roll-ups are below. Sausage Roll-Ups One batch of Biscuit Dough 1 pound of bulk sausage, uncooked Prepare biscuit dough. On a well-floured surface, roll dough out to 15” x 24”. Crumble sausage and spread evenly over dough (an offset spatula helps). Starting from the long side, roll up jellyroll style. Cut roll in half crosswise with a sharp knife. Wrap each half in waxed paper or parchment and again in plastic wrap. Refrigerate for one hour or overnight. Preheat oven to 425° F. Lightly grease two 9 x 13-inch baking sheets. Remove wrapping from dough and cut into 1” slices. Place rolls cut side down on baking sheets and space them evenly. Bake for 12 to 15 minutes until sausage is cooked and rolls are golden brown on the edges. Serve warm. 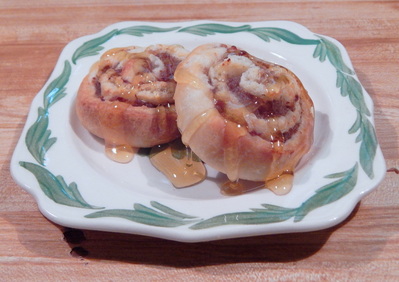 Sausage Roll-Ups drizzled with honey--the perfect combination of sweet and savory. Sausage Roll-Ups drizzled with honey--the perfect combination of sweet and savory. I like to eat mine drizzled with honey or maple syrup, but for something a bit more savory, sprinkle the tops with finely shredded asiago cheese or a mixture of mozzarella and Parmesan as they emerge hot from the oven. You can make the jellyroll and slice immediately, but they are harder to slice that way and tend to spread out more when baking. But either way they are delicious and will disappear quickly from your buffet table. I've also had success baking them the night before and reheating the next day. Just let them cool completely on the pans, cover the pans with aluminum foil and refrigerate. Reheat the next morning, covered, at 375° F. for five minutes, then uncovered for another five to seven minutes until heated through. One last comment: these are not a heart healthy bread! The dough is loaded with butter and sausage of course can be laden with fat, salt and calories. That's why my family only served these once or twice a year. But my oh my are they good! God bless and happy baking! 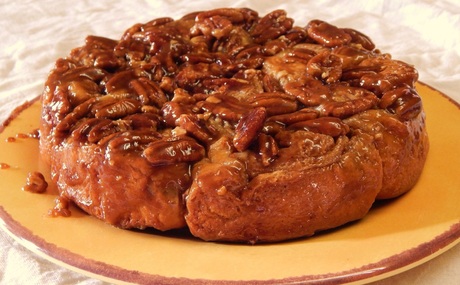 The pinnacle of breakfast breads! The pinnacle of breakfast breads! The Breadhead Breakfast project has been inspiring me to think of new variations on some of my old favorites. Although my monastic brethren love cinnamon rolls (a moment of silence as we all contemplate the glory of Fab's Nutty Goodness) I've been experimenting with different fillings in the last year or so. I've made Strawberry Rolls and little spirals of pastry and pineapple filling using Shortcut Croissant dough, and even added Chinese Five Spice instead of cinnamon. None of this is particularly adventuresome compared to, let's say, chefs of Chopped, but it is making me explore some new flavor profiles. 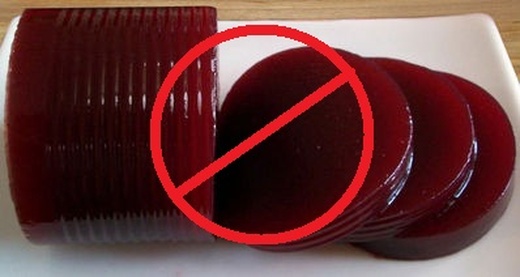 DON'T USE THIS STUFF! DON'T USE THIS STUFF! For several weeks I've been planning to experiment with cranberry sauce, because I found a small can of it in the pantry. I DON'T mean the stuff that looks like cranberry jello and can be serve in slices. This was whole berry cranberry sauce---not as good as fresh cranberries, but it's what I had in the kitchen without having to to the store. I once enjoyed a delectable cranberry salad with mandarin orange slices, so I decided to add that flavor as well. I made a batch of Basic Roll Dough but I used only 4.5 cups of flour, leaving the dough very soft. As it rose, I took the cranberry sauce (14-oz. can.) and stirred in a teaspoon of freshly grated orange zest (about half an orange--the rest goes in the icing), and 1/4 cup of orange juice. I thought the filling lacked tartness, so I added 1/2 cup of dried cranberries--much better. I rolled the dough out as usual (about 15" x 12"), spread the filling and rolled it up for slicing. I made 15 rolls, but you could do 12 and make more generous servings. They went into a 9" x 13" greased pan and rose for about half an hour. In my commercial convection oven they baked in 18 minutes at 350, but in a regular oven it would take about 30 minutes. 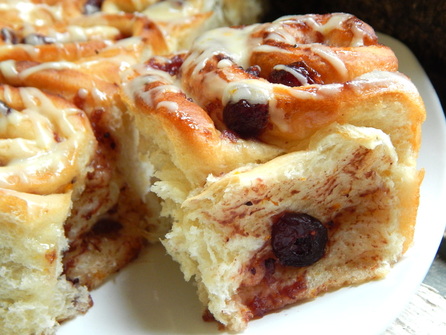 The icing was made with a cup of powdered sugar whisked with 1 teaspoon of fresh orange zest and two tablespoons of orange juice. I heated it in the microwave on high for ten seconds and then drizzled it over the rolls. Go easy on the icing--the filling is plenty sweet. They were much enjoyed by the monks and several lucky members of the faculty of our high school. 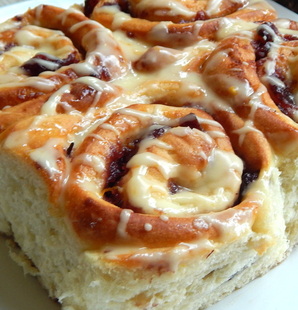 A little Internet research revealed that there are a wide variety of orange-and-cranberry-flavored breads out there, from rolls to scones to muffins. Some roll recipes use fresh cranberries in a food processor with orange marmalade, which made for a beautifully rich, red filling; some added walnuts for a little crunch. Plenty of recipes still to be explored. If there is leftover cranberry salad after this year's Thanksgiving feast, I have a pretty good idea what I'll be serving for breakfast the next morning! God bless and happy baking! 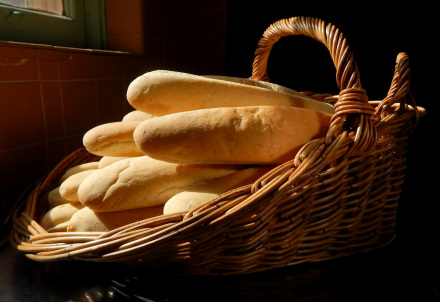 Italian Onion Herb Bread in the abbey kitchen, fresh from the oven. Italian Onion Herb Bread in the abbey kitchen, fresh from the oven. Last night was the annual picnic for the Illinois Valley Herb Guild to which I belong. I heard that beer brats were going to be served, as well as tortellini, so I thought---as usual!---we needed some homemade bread to go along with such alfresco delights. I chose to make skinny loaves of Italian Onion Herb Bread, a perennial favorite here at the abbey, which could be used to house the brats or to mop up bolognese sauce. After these beauties were out of the oven, I realized two things: 1) I needed to make sweet hot mustard as well; and 2) I had never posted the recipe for Italian Onion Herb Bread on my recipes page. The first task required some experimentation with regular yellow mustard, St. Bede honey, crushed red pepper, horseradish and garlic, and after all the multiple tastings and tweakings, I couldn't tell you the recipe if I tried. A task for another day. 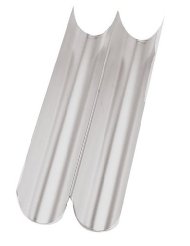 But the recipe for Italian Onion Herb Bread has been duly posted on my recipes page; for a shortcut, click HERE. If you make a dozen of these beauties for a bake sale, I guarantee you'll sell every loaf. I like to make them in "W" pans (usually called "French bread pans") but you can roll out long skinny loaves and bake them on a standard sheet tray as well. Mine look like this and are made by Fox Run, but there are lots of other shapes and sizes out there: HERE's a sampling. The ones pierced with holes are more expensive but create a more crisp crust. God bless and happy baking!  Thanks to my cousin Bob sending me the black beauty in the middle, I now have a pretty complete set of stand mixers. I can mix everything from one loaf up to about two dozen. It's like the Three Bears decided to shop at the appliance store. This weekend I was invited to a cookout by some dear friends and decided to christen the new model by making a batch of homemade hamburger buns, using a recipe from King Arthur Flour: you can find it HERE. The recipe makes 18 buns, using a little over three ounces of dough per bun.  You don't have to have the special pans---they're a bit pricey, and I wouldn't have them if they hadn't been deeply discounted at my favorite kitchen store. The main thing is to shape the balls of dough as smoothly as possible, then flatten them to about 3" across. My video on how to shape perfectly round balls of dough might help: find it HERE.  If I had left the dough a little wetter, a little more slack, I would have gotten rolls with flatter bottoms and they'd probably softer, too. But these were sturdy enough to hold up under the pressure of a burger piled high with toppings, so I have no complaints.  A burger with cheddar, tomato, onion, coleslaw and mustard, and crockpot mac and cheese. We had brownies for dessert--it was a meal made of comfort foods! Next post I'll show off the appetizers I made with a shortcut croissant dough that's not as time-consuming as the traditional pastry dough, and better for you than the stuff that comes out of a tube. |
AuthorFr. Dominic Garramone AKA Categories
All
Archives
June 2024
|